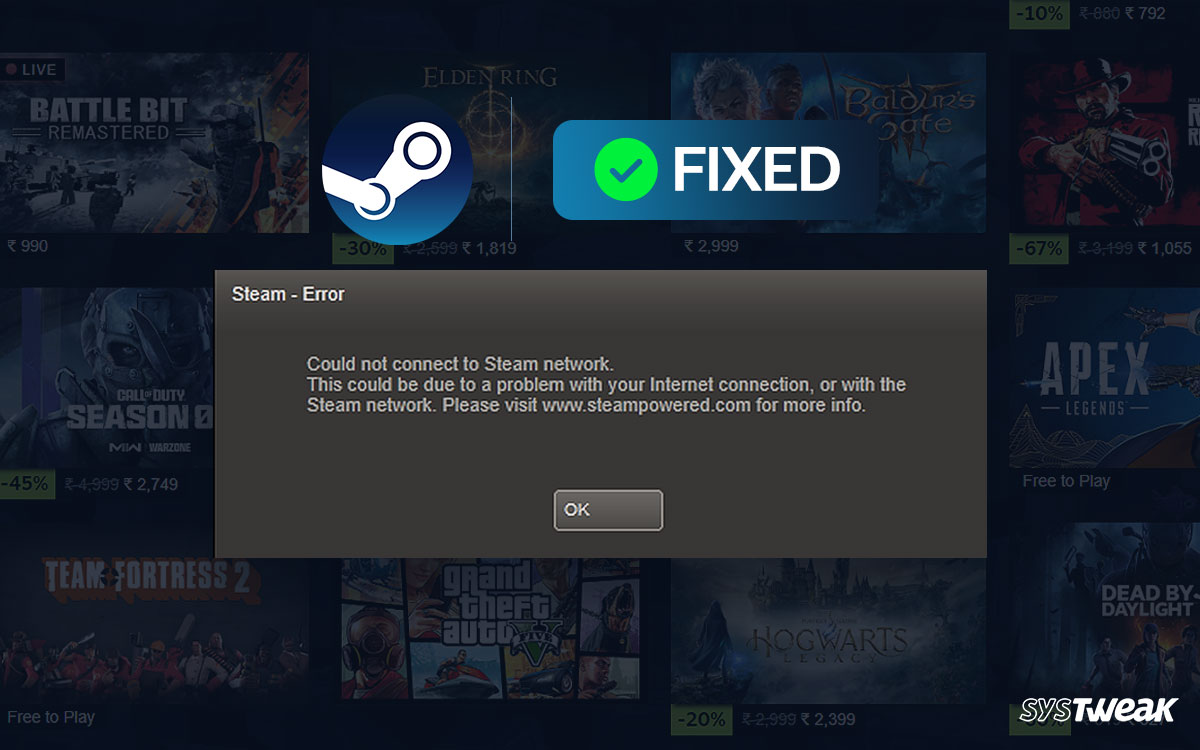
Could not connect to Steam Network is an error several Steam users have reported. The network plays a crucial role while downloading any title or playing an online game with friends. This means whenever a user cannot connect to the internet while using Steam; it hampers the overall experience.
50% OFF

BLACK FRIDAY OFFERS
Unlock Black Friday Mega Savings — Systweak Tools FLAT 50% OFF!
If you are facing a similar problem or have encountered the Could not connect to Steam network but internet is fine error on your PC, this post may be of great help. In this one, we will try to break down the problem, understand what’s causing it in the first place, and list a few fixes that may help you out with the same.
So without further ado, let’s begin by understanding why the problem occurs.
What Causes “Could Not Connect To Steam Network” Error?
The first thing to understand is that it is a problem that has been around for a while. Please note that the issue has been reported by a wide variety of Windows 10 and Windows 11 users. Not only this, the error is often observed on Mac and Linux devices as well. However, for the sake of this post, we will be focusing on issues with Windows only.
Some of the core reasons why could not connect to Steam network error appears on a Windows PC include –
- Changes in Application Configuration
- An issue with Network Bandwidth
- Hardware Issues With Routers & Network Switches
- Outdated Network Adapter Drivers
- Defender/Antivirus Firewall Issues
Other than these issues, other network-related errors may often occur and cause problems with connectivity. Since the internet is crucial for Steam to run smoothly, one must overcome connection issues. Thankfully, the could not connect to Steam network error is easily fixable. Check out the next section to find the ultimate troubleshooting means for the issue on Windows 11 and 10.
Note : Please note that the fixes below are showcased on Windows 11 however can also be performed on Windows 10 using the same steps.
5 Ways to Fix Could Not Connect To Steam Network Error on Windows
Fix #1 – Start Steam Using TCP Extension
The best thing about using Steam is that you can use it with extensions that allow you to change its default settings. For instance, you can use the TCP extension to switch the type of network and bypass the could not connect to Steam network issue easily. Here’s what you need to do –
Step 1 – Press Ctrl+Shift+Esc to bring up the Task Manager.
Step 2 – Go to the Details tab in the Task Manager and check for Steam processes. Close all the running processes by identifying them using the description tab.

Step 3 – Once all the processes are stopped, simply head to the Steam launcher shortcut.

Step 4 – Right click on the shortcut and open its properties.
Step 5 – You may find a dedicated field called Target in the properties window. This is where you must add TCP as an extension to the target file.
Once you have added the extension, save the changes and try using the application.
Fix #2 – Troubleshoot the Network on Your PC
The could not connect to Steam network error is caused due to network configuration malfunction or other network errors on your PC. The best way to handle this is by troubleshooting and fixing such issues. Fortunately, Windows has an inbuilt mechanism to do so. Here’s what you need to do –
Step 1 – Go to the Start menu on your PC and look for Command Prompt
Step 2 – Click Run as Administrator to open the CMD in the found result.

Step 3 – Now, in the Command prompt Windows, use the following commands one after the other (press enter after each command)
ipconfig/release
ipconfig/all
ipconfig/flushdns
ipconfig/renew
netsh winsock reset

Step 4 – After completing all the commands, your internal network errors should be resolved. Try rerunning Steam to see if the issue is resolved.
Read Also: Fix – No Sound Steam Games Windows 11/10
Fix #3 – Update Network Adapter Driver
If the above fix cannot help you, do not worry, as sometimes, the issues lie with the network adapter and not directly in the network itself. Hence, it is recommended that you keep your network adapter drivers up to date.
Here’s how to do it –
Step 1 – Press Windows+R to open the run search.
Step 2 – In the Run search, use the command devmgmt.msc

Step 3 – The above command will open the device manager. Look for your network adapter in the list of connected devices.
Step 4 – Right-click on your network adapter to find the Check for Updates option. Click on it.
Step 5 – This brings up the Windows Driver Update Utility. Follow the steps of the utility to get over with the updates.
While the process is sufficient to update your driver, it is not efficient. That is because you may have to repeat the same steps whenever you want to update any of the drivers on your PC.
The process is lengthy. Hence we recommend using Advanced Driver Updater. It is an automated tool to help you update outdated drivers in seconds. And the best part is that it updates all of them in a single click. Here’s how it works –
- Download the tool from the link below.

- Click on Start Scan Now.

- Check for Outdated Drivers
- Click on Update All

- Wait while the Drivers are updated
Now you have both options available. The choice is yours.
Fix #4 – Add Steam to the Allowed Apps List in Firewall
Sometimes, the security firewall on your PC stops an application from using a certain number of resources. lost connection to Steam is an issue that may appear for the same reason. Follow the given instructions to avoid getting network access blocked –
Step 1 – Go to the Start Menu on Your PC and search for Windows Security.

Step 2 – In the Windows Security options, Go to Firewall & Network Protection.

Step 3 – You may find the Allow an app or feature through the Windows Defender Firewall option in the opened options. Click on it.
 Step 4 – Change the settings and add Steam to the list of allowed apps.
Save all the changes and restart the Steam app to see if it allows you to access the network and resolve the error.
Fix #5 – Reinstall Steam Client
If none of the above methods helped you, chances are there’s an issue with the client you are using. The best way to resolve this is to uninstall the existing copy of Steam and install a newer version.
Step 1 – Go to All Apps in the System settings, find Steam, and uninstall it.
Step 2 – After the application is removed completely, download and install the latest version of Steam.

Step 3 – Restart your PC once the latest installation is over.
With all these available methods, resolving the could not connect to Steam Network error should be easy. All these fixes work with Windows 10 and 11, so you may try them accordingly.
Fixing the network requirements of Steam is essential, as you can never make the most of it without connectivity. Hope these fixes assist you achieve the best possible results and fix the network problems with Steam.
That’ll be all for this post. Thanks for reading!
Recommended :
How to Fix Steam Black Screen not Loading
Steam Disk Write Error – Best Ways to Fix